
Table of Contents
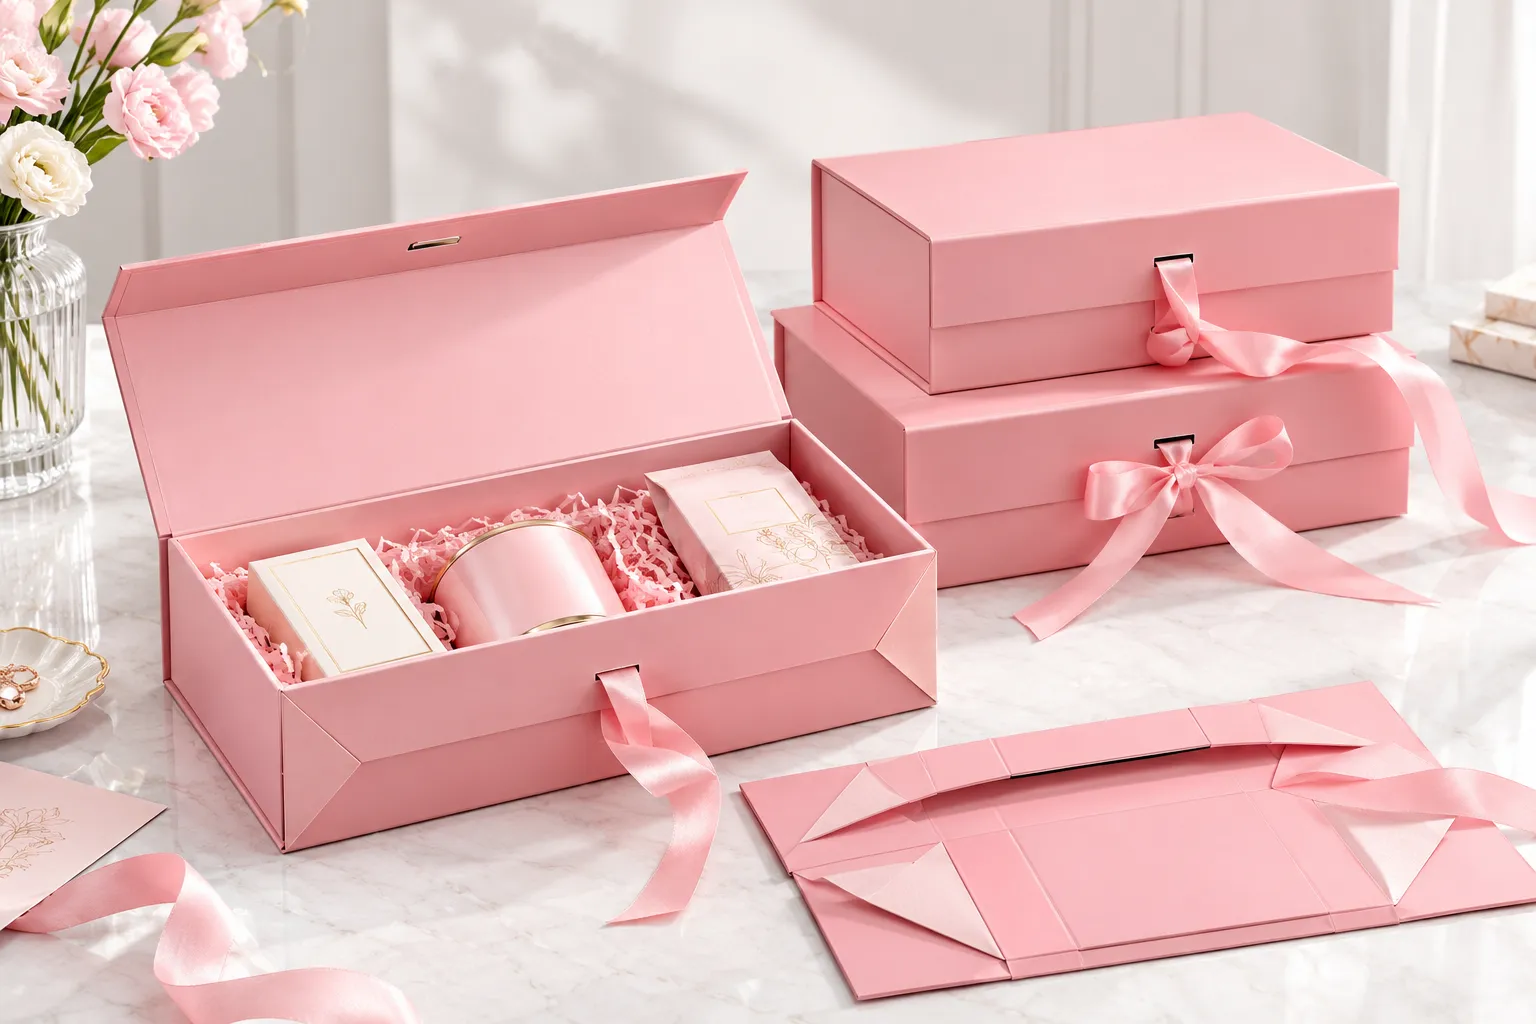
How to Design a Presentation-Ready Gift Box for Better Product Display
22. 9 月, 2026Written by Esion Package Editorial Team
Last updated: September 22, 2026
At Esion Package, we work with brands on custom packaging projects where the challenge is often not simply choosing a box, but making the finished packaging present the product in the right way.
A box can be structurally suitable and still create a weak presentation. The product may sit too low, move during handling, appear surrounded by unnecessary space, or lose visual impact when the box is opened.
This is where presentation-ready gift box packaging becomes useful. Rather than treating presentation as a separate box type, it is better to think of it as a layer of packaging design that controls product positioning, internal layout, branding, and the opening experience.
This guide explains how to build that presentation layer around an appropriate box structure. If you are planning a new packaging project, you can use the process below to identify what needs to be solved before sampling and production.
What Makes a Gift Box Presentation-Ready?
A presentation-ready gift box is not a separate structural category. It is a box in which the product position, internal layout, branding, and opening sequence have been deliberately planned.
Different box structures can therefore provide a presentation-ready result.
Start with the product, not the empty box
The first question should be:
What should the customer see when the box is opened?
For example, consider a product measuring approximately 180 × 120 × 45 mm.
If that product is placed inside a much larger box without a defined position, it may technically fit but still look unfinished. A more controlled layout could position the product centrally, manage the surrounding space, and use an insert where necessary to keep it stable.
The packaging is therefore designed around the product rather than an arbitrary box size.
Create a clear visual hierarchy
The customer should not have to search for the main product.
A practical hierarchy is:
Product → Brand → Supporting elements
The product receives the primary visual attention. The logo, printed message, accessories, or documentation should support that focus rather than compete with it.
Make the opening sequence intentional
A useful presentation should work from the first moment the box is opened.
Think through:
Closed → Opened → Product revealed → Product removed
If a card or accessory blocks the product when the box opens, the intended presentation has already been interrupted.
How Should You Plan the Product Layout?
The internal layout usually has more influence on presentation than simply adding decorative features.
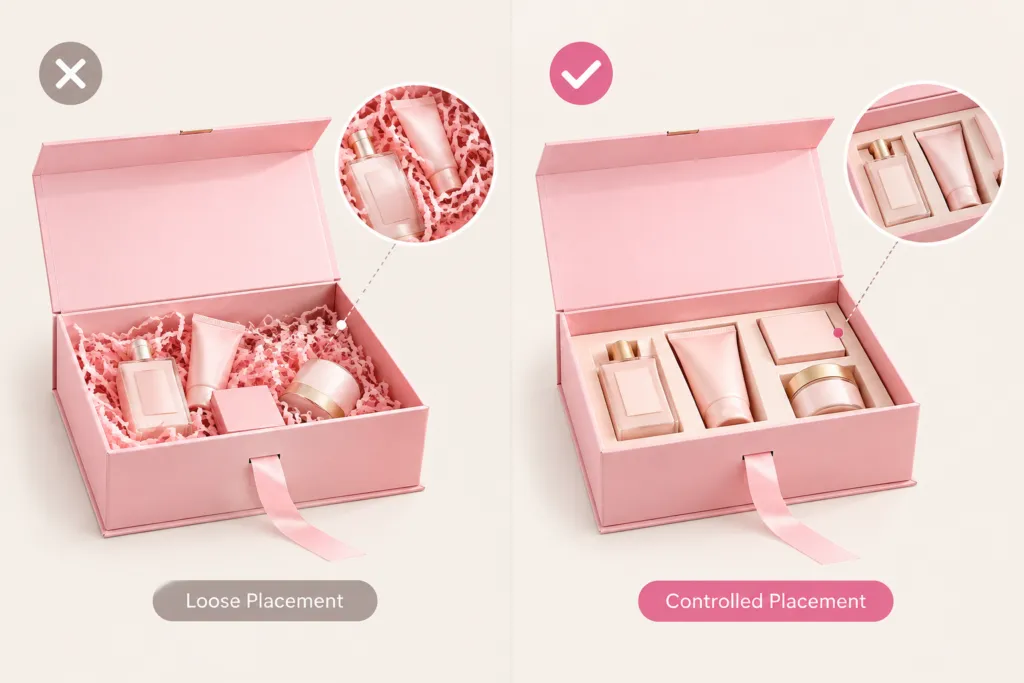
Define the primary product position
Decide whether the product should sit centrally, horizontally, vertically, or at a specific angle.
This becomes particularly important when the product has a defined front-facing surface or when several components need to be presented together.
The desired position should be established before the final internal dimensions are confirmed.
Use the insert to control movement
An insert is useful when the product needs to remain in a specific position.
The purpose is not to fill every empty area. It is to provide enough support to prevent unwanted movement while keeping the insert visually secondary to the product.
For a multi-piece package, the insert can also establish a clear relationship between the main product and accessories.
Control unnecessary empty space
Empty space can be intentional, but uncontrolled empty space often makes a package look oversized.
For example, a small product inside a much larger box may appear less important rather than more premium.
The better approach is to balance:
Product size → Internal space → Visual proportion → Protection
How Does the Opening Experience Affect Product Presentation?
The opening sequence should be treated as part of the packaging design rather than something considered after the box is finished.
Think about the first few seconds
When the customer opens the package, they should quickly understand:
- where the main product is;
- what they should notice first;
- whether any secondary components need to be removed.
For example, imagine a presentation containing a main product, a printed card, and a small accessory.
If both the card and accessory are placed directly over the product, the customer sees the supporting elements first. The product loses the visual priority that the packaging was supposed to create.
Moving those components to a separate position or lower layer can change the entire opening sequence without requiring a more complicated box structure.
Keep secondary elements in their proper place
Cards, accessories, protective sheets, and other components can all be useful, but they should have a clear role.
If the product is the main reason for opening the package, supporting components should not visually dominate it.
Test the actual opening movement
This is one reason physical sampling matters.
Open the sample naturally rather than arranging it for photography. Watch what the customer sees first, what moves, and whether any component needs to be repositioned.
How Can Branding Support the Product Instead of Distracting From It?
Branding should reinforce the product presentation rather than compete with it.
Place the logo where it remains visible
Logo placement needs to be considered in both the closed and open states.
A logo that looks balanced on the lid may become hidden when the box is opened. Conversely, repeating the logo across every internal surface can make the presentation feel crowded.
Keep brand colors consistent
Color consistency matters when several printed surfaces are visible together.
The approved artwork should therefore be treated as a production reference rather than simply a visual suggestion.
This becomes especially important when the same brand color appears on the outer box, interior surface, insert, and printed accessories. A small visual difference between these elements can become much more noticeable when they are viewed together.
Use finishing with a clear purpose
Finishing can help establish the desired surface appearance, but adding more finishing does not automatically create better presentation.
For example, if the main objective is to make a small logo easier to notice, improving its placement and contrast may have more impact than adding several decorative finishes around it.
The more useful question is:
Does this detail strengthen the way the product and brand are perceived?
If it does not, it may not be necessary.
Should You Choose the Box Structure Before Designing the Presentation?
Yes. Structure and presentation should be connected, but they should not be treated as the same decision.
A presentation-ready gift box is an application approach rather than one specific box structure. Before planning the product layout, you should first decide which structure fits the product, budget, storage, shipping, and opening requirements.
If you are still comparing structures, use the relevant guide before moving into presentation details:
- Magnetic Gift Boxes: A Complete Guide — useful when you want to compare rigid and foldable structures, particularly when storage and shipping efficiency are important.
- Luxury Rigid Boxes — useful when the project requires a substantial rigid construction and premium presentation.
- Foldable and Folding Gift Box Options — useful when storage, shipping efficiency, and a more flexible box structure are important.
Once the structure has been selected, this article focuses on the next question:
How should the product, insert, branding, and opening sequence be arranged to create a better presentation?
This separation keeps the site’s content architecture clear:
Structural guides explain what the box is and when to use it.
This article explains how to make the selected structure present the product effectively.
What Should You Check During Sampling?
Sampling is where presentation decisions should be tested against the physical product.
A screen can show artwork, but a physical sample shows whether the complete packaging experience actually works.
Check product positioning
Place the actual product inside the sample.
Check whether:
- the product sits in the intended position;
- it moves excessively;
- it is easy to remove;
- it sits at the correct height;
- accessories remain where intended.
A small change in product height can also affect how much of the product is visible when the box opens. This is why internal dimensions should be evaluated with the actual product rather than only with a technical drawing.
Check the opening sequence
Open the box exactly as a customer would.
Do not rearrange the product before checking it. The goal is to see what the customer naturally encounters first.
If the product is supposed to be the focal point but a card, insert flap, or accessory appears first, the sample should be revised before approval.
Check the visual balance
Look at the complete package rather than inspecting only individual details.
A logo may look correct in isolation while the complete package still feels visually unbalanced.
Check production consistency
At Esion Package, sampling also provides an opportunity to confirm material, printing, processing, hand assembly, and QC requirements before mass production.
As of September 2026, Esion Package’s standard MOQ is 1,000 pieces, and production is typically around 15 days once the required specifications and approvals are confirmed. Actual timing should be reconfirmed for each project because structure, finishing, quantity, and sampling requirements can affect the schedule.
How Can Presentation Requirements Affect Packaging Cost?
A presentation-ready package does not necessarily require an expensive or complicated structure.
Cost is affected by the actual production requirements rather than by the word “presentation.”
A simple layout can still look premium
A well-positioned product, accurate printing, and clean internal proportions can create a stronger result than a complicated package with too many decorative elements.
For example, changing the position of a product insert may improve the opening experience without changing the outer box structure at all.
This is why presentation decisions should be made before adding unnecessary structural or finishing features.
Inserts can change production requirements
A custom insert may require additional material, die cutting, folding, gluing, or hand assembly.
The difference can be significant depending on the design.
A simple flat insert may involve relatively straightforward processing, while an insert with multiple product cavities, folded walls, locking points, or irregular cut-outs can require additional production and assembly steps.
For that reason, the insert should be included in the original quotation discussion rather than added after the box has already been priced.
More customization requires clearer specifications
As customization increases, the approved sample becomes more important.
A buyer should not evaluate only the appearance of the box. The sample should also confirm how the product fits, how the insert works, how the box opens, and how the finished components are assembled.
The objective is not to maximize the number of features. It is to make sure the features that matter to the product presentation are correctly produced.
What Should You Prepare Before Requesting a Quote?
A clear packaging brief makes the first quotation more useful and reduces unnecessary back-and-forth.
Product information
Prepare:
- Product dimensions
- Product weight where relevant
- Number of components
- Preferred product orientation
- Product photos or samples
Presentation requirements
Explain what the customer should see first and how the product should be positioned.
An annotated product image can sometimes communicate this more effectively than a long written description.
For example, you can mark the image with:
“Main product faces upward”
“Logo visible when opened”
“Accessory positioned beside product”
This gives the packaging team a much clearer starting point than simply requesting a “premium presentation box.”
Branding information
Prepare the logo, artwork, brand colors, preferred material direction, and any required finishing.
If several printed surfaces need to match, make that requirement clear during the quotation and sampling stage.
Quantity and timeline
State the expected quantity and target delivery date.
For custom projects, these details help the supplier evaluate structure, sampling, production, and QC requirements before providing a quotation.
What Does a Presentation-Ready Packaging Workflow Look Like?
The most efficient workflow is usually a sequence in which presentation decisions are made before mass production.
Product Information → Structure Selection → Presentation Layout → Sample → Revision → Approval → Production → QC → Shipment
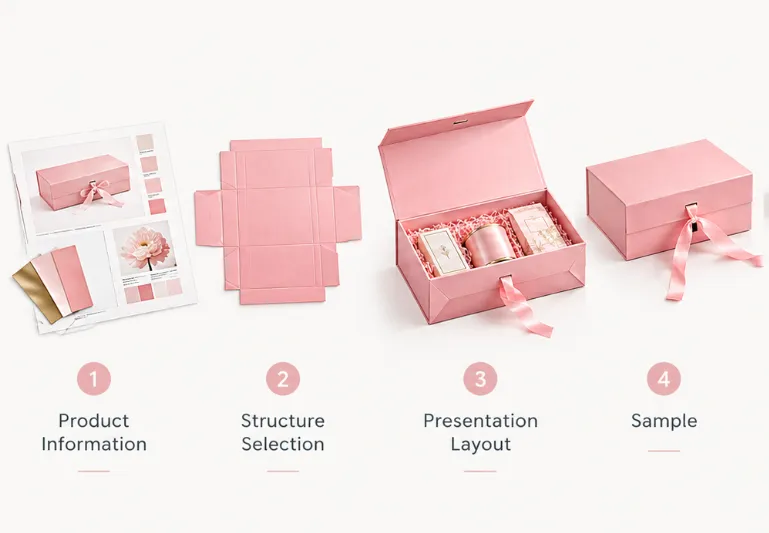
The key point is that presentations should be tested during the sample phase, rather than after production has begun.
For a packaging manufacturer, this also reduces communication gaps between design requirements and production requirements.
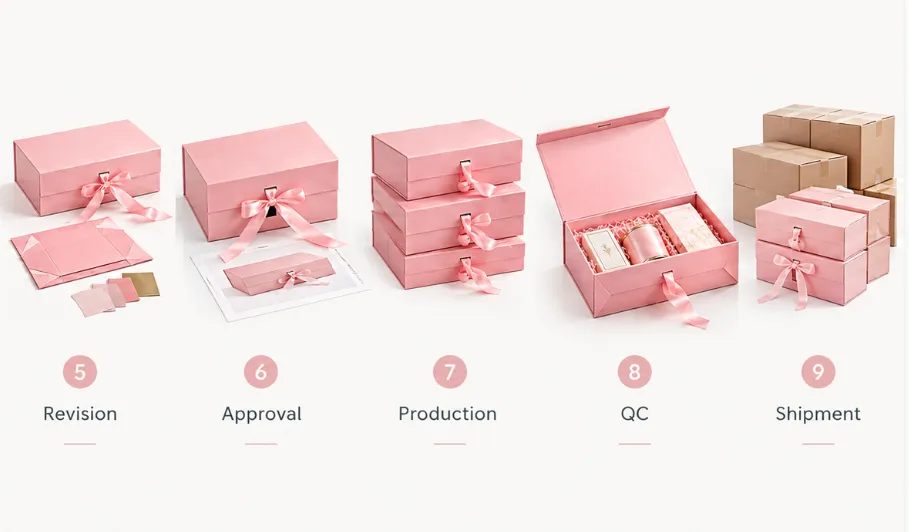
Esion Package can support this workflow by coordinating material selection, printing, processing, hand assembly, sampling, and QC within one packaging project. For buyers, the practical advantage is having fewer disconnected production stages to coordinate.
How Should You Decide Whether the Final Presentation Works?
Before approving production, perform one final test:
Open the package exactly as your customer would.
Do not rearrange the product beforehand.
Check whether the product appears in the intended position, whether the branding is visible, whether secondary components are easy to understand, and whether the overall package feels proportionate.
If the presentation works naturally, the design is doing its job.
If it does not, it is usually better to revise the sample than to compensate later with additional decoration or a larger box.
Presentation-Ready Gift Box Checklist
Before approving the final sample, confirm:
- Product dimensions have been verified.
- Product position has been defined.
- Internal space is appropriate.
- The insert holds the product securely where required.
- The product is the first visual focus.
- Supporting components do not block the product.
- Logo placement works in the open and closed states.
- Brand colors have been checked against the approved artwork.
- The physical sample has been tested.
- Assembly and finishing have been checked.
- Production specifications match the approved sample.
- Quantity and delivery requirements have been confirmed.
FAQ
What does presentation box mean in packaging?
In packaging, a presentation box generally refers to packaging designed to present a product effectively, including its positioning, branding, and opening experience. It describes an application or presentation purpose, rather than one specific box structure.
Is a presentation box the same as a rigid box?
No. A presentation box can use different packaging structures. “Presentation” describes the intended product-display experience, while terms such as rigid box or magnetic box describe structural characteristics.
How can I make a gift box more suitable for product presentation?
Start with product positioning, internal layout, inserts, opening sequence, and branding. The objective is to make the product the clear visual focus without creating unnecessary space or decoration.
Do I need a custom insert for a presentation-ready box?
Not always. An insert is useful when the product needs controlled positioning, additional stability, or a specific visual arrangement. Products that naturally remain stable may not require a complex insert.
What should I check before mass production?
Check the physical sample for product fit, positioning, opening sequence, printing, color, assembly, surface finish, and overall visual balance. The approved sample should then serve as a production reference.
Once the product dimensions, presentation requirements, artwork, quantity, and timeline are ready, you can contact Esion Package to discuss the project and request a quotation.